关于此文档,如果你有任何问题,可以发邮件到我的邮箱,邮箱地址为 zrg1390556487@gmail.com.
This is a installation process of "Apache+MySQL+PHP" source packages on linux environment.It's content only
前言(Preface)
建议根据文档顺序依次安装。
安装Apache
解压
#tar jxvf httpd-2.4.18.tar.bz2
#cd httpd-2.4.18/
配置
#./configure --prefix=/usr/local/apache2 --enable-so --with-included-apr
此时可能会出现如下错误,这是因为ARP和ARP-util缺失。

安装APR和APR-util
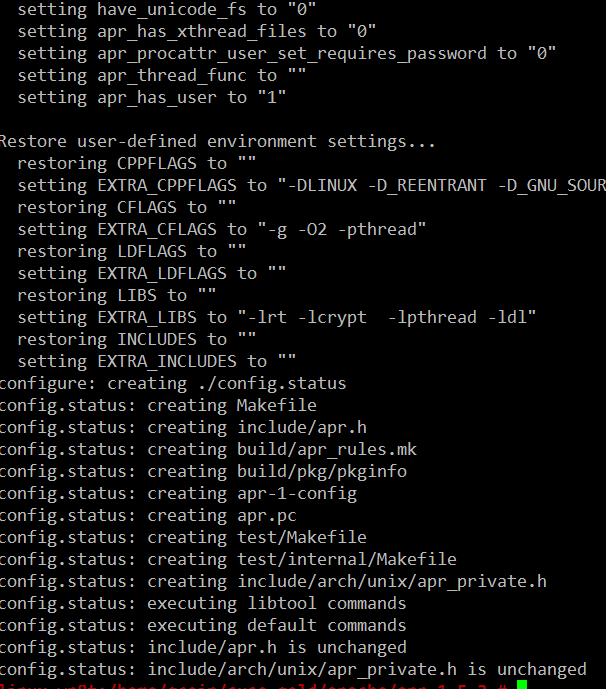
到 http://apr.apache.org/download.cgi 下载apr和apr-util
#tar jxvf apr-1.5.2.tar.bz2
#cd apr-1.5.2/
#./configure --prefix=/usr/local/apr
此时,可能会出现libtool缺失,如下图所示。

解决办法:
 安装libtool、autoconf及automake:#zypper in autoconf libtool automake
 然后执行:# autoreconf --force --install
       #autoreconf --force --install
       #autoreconf --force --install
       之后,打开configure文件(现在使用的版本是apr-1.5.2,30212行),注释   $RM -f "$cfgfile",就是在前面添加“#”。
重新执行./configure --prefix=/usr/local/apr,问题解决。
成功标志:
编译安装apr
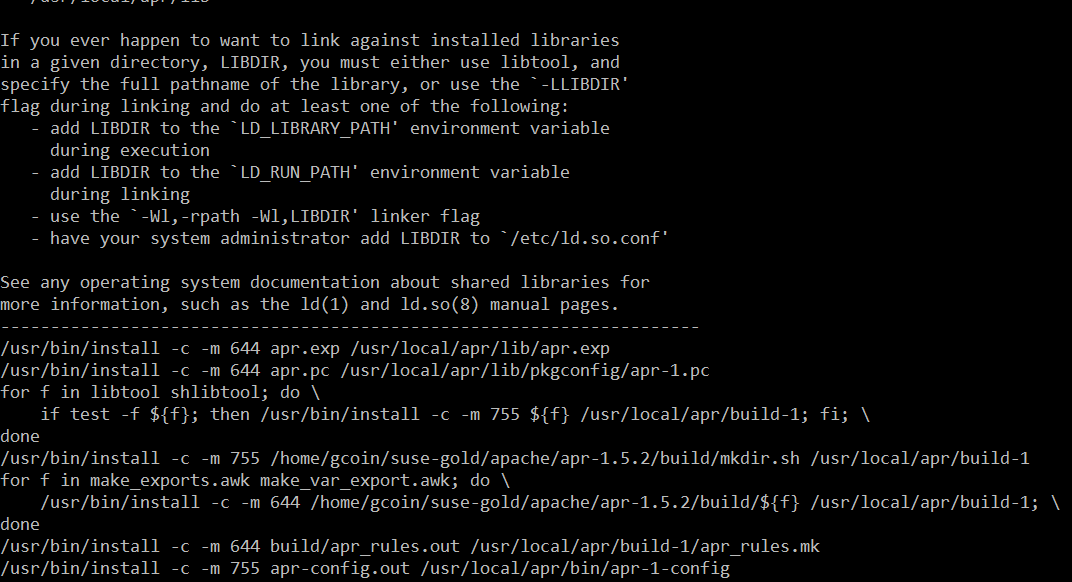
#make && make install ,成功标志:
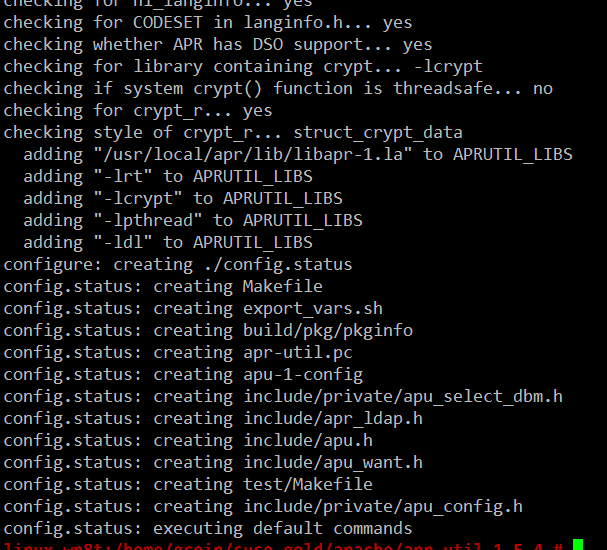
接下来,安装APR-util。
同样,解压配置,注意使用了--with-apr:
#tar apr-util-1.5.4.tar.bz2
#cd apr-util-1.5.4/
# ./configure --with-apr=/usr/local/apr
成功标志:
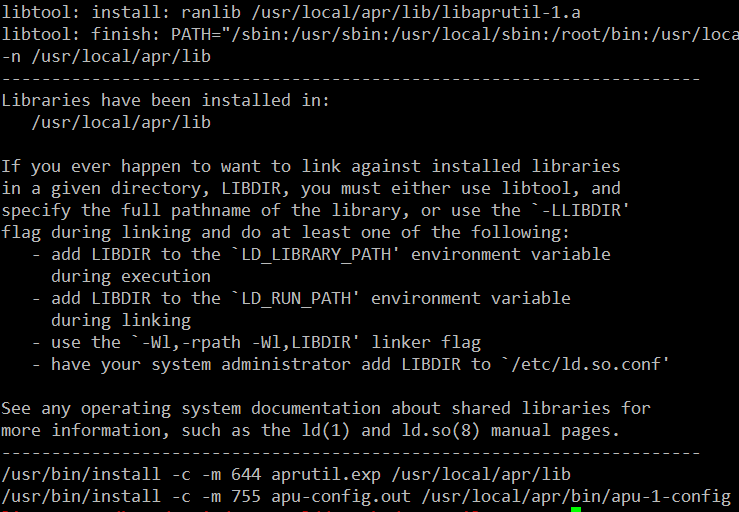
#make && make install ,成功标志:
运行安装apache(httpd)
#./configure --prefix=/usr/local/apache2 --enable-so

解决办法:到https://sourceforge.net/projects/pcre/files/ 下载pcre并安装。
#./configure --prefix=/usr/local/pcre
成功标志:
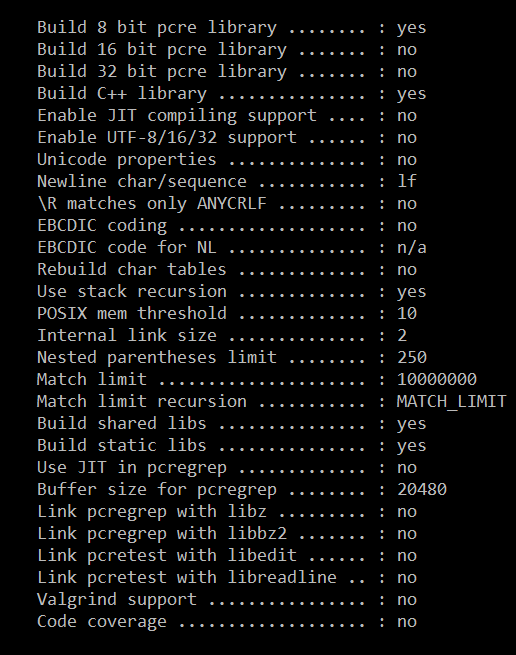
#make && make install ,成功标志:
进入apache目录,重新运行配置命令:
#./configure --prefix=/usr/local/apache2 --enable-so ,问题解决。
成功标志:
#make && make install ,成功标志:
至此,Apache安装成功
启动Apache
因为是源码包安装,所以只能执行下列命令:
# /usr/local/apache2/bin/apachectl start
此时,出现下图错误,这是因为ServerName配置不正确的原因。

解决:# vim httpd.conf
ServerName localhost:80

改完后,重启apache:# /usr/local/apache2/bin/apachectl restart
可以查看开发端口号:# netstat -tnlp
设置开机启动
# cp /usr/local/apache2/bin/apachectl /etc/init.d
# chmod 755 /etc/init.d/apachectl
# chkconfig --add apachectl                   ;add对应del
# chkconfig --level 35 apachectl on        ;on对应off
# chkconfig --list                    ;显示开机可以自动启动的服务
配置Virtual Host
Configure virtual host
LoadModule vhost_alias_module modules/mod_vhost_alias.so
# Virtual hosts
Include conf/extra/httpd-vhosts.conf
<VirtualHost 127.0.0.1:80>
    #directory
    DocumentRoot "D:\phpStudy\WWW\ec-shop\gold"
    ServerName local.gold
    #    ServerAlias www.dummy-host.example.com
    #    ErrorLog "logs/dummy-host.example.com-error.log"
    #    CustomLog "logs/dummy-host.example.com-access.log" common
    DirectoryIndex index.html index.htm index.php
    <Directory />
      Options FollowSymLinks
      #不许可别人修改我们的页面
      AllowOverride None
      #设置访问权限
      Order allow,deny
      Allow from all
    </Directory>
</VirtualHost>
127.0.0.1 local.gold
Explain:
      a.About hosts:a computer file to be used to store information on where to find an internet host on a computer network

      b.When the user input a URL in the browser, the system will automatically search for the corresponding IP address
        from the Hosts file, once found, the system will immediately open the corresponding page, if not found, then the
        system will be submitted to the DNS domain name resolution server IP address.
Configure multiple ports and multiple sites
Add listening port:
  Listen 81
  Listen 82
<VirtualHost *:81>
#    ServerAdmin webmaster@dummy-host2.example.com
     DocumentRoot "d:\wamp\www\wp-job"
     ServerName localhost
#    ErrorLog "logs/dummy-host2.example.com-error.log"
#    CustomLog "logs/dummy-host2.example.com-access.log" common
</VirtualHost>

<VirtualHost *:82>
#    ServerAdmin webmaster@dummy-host2.example.com
     DocumentRoot "d:\wamp\www\wordpress"
     ServerName localhost
#    ErrorLog "logs/dummy-host2.example.com-error.log"
#    CustomLog "logs/dummy-host2.example.com-access.log" common
</VirtualHost>
安装Nginx
Nginx 介绍
Nginx是一款免费、开源、高效的 HTTP 服务器,Nginx是以稳定著称,丰富的功能,结构简单,低资源消耗。
配置yum源
[nginx]
name=nginx repo
baseurl=http://nginx.org/packages/centos/$releasever/$basearch/
gpgcheck=0
enabled=1
安装(Installing)
yum install -y nginx
//设置nginx开机自启动
systemctl enable nginx.service
//启动/停止/重新启动nginx
systemctl start/stop/restart nginx.service
打开 HTTP 和 HTTPS 防火墙端口
firewall-cmd –permanent –zone=public –add-service=http
firewall-cmd –permanent –zone=public –add-service=https
firewall-cmd –reload
配置Nginx
/etc/nginx/conf.d/default.conf
环境要求:能够正常访问网页
server {
    listen       80;
    server_name  localhost;

    #charset koi8-r;
    access_log  /var/log/nginx/default.access.log  main;

    location / {
	root   /srv/www;
	index  index.php index.html index.htm;
    }

    error_page  404              /404.html;

    # redirect server error pages to the static page /50x.html
    #
    error_page   500 502 503 504  /50x.html;
    location = /50x.html {
	root   /srv/www;
    }

    # proxy the PHP scripts to Apache listening on 127.0.0.1:80
    #
    #location ~ \.php$ {
    #    proxy_pass   http://127.0.0.1;
    #}

    # pass the PHP scripts to FastCGI server listening on 127.0.0.1:9000
    #
    location ~ \.php$ {
	root           /srv/www;
	fastcgi_pass   127.0.0.1:9000;
	fastcgi_index  index.php;
	fastcgi_param  SCRIPT_FILENAME  $document_root$fastcgi_script_name;
	include        fastcgi_params;
    }

    # deny access to .htaccess files, if Apache's document root
    # concurs with nginx's one
    #
    location ~ /\.ht {
	deny  all;
    }
}
/etc/nginx/conf.d/vhosts/finance.conf
环境要求:php, ThinkPHP5, pathinfo,
server {
    listen       8080;
    server_name  localhost;

    #charset koi8-r;
    access_log  /var/log/nginx/finance.access.log  main;

    location / {
        root   /srv/www/finance/public;
        index  index.php index.html index.htm;
        if (!-e $request_filename) {
                rewrite  ^(.*)$ /index.php?s=/$1 last;
                break;
        }
    }

    error_page  404              /404.html;

    # redirect server error pages to the static page /50x.html
    #
    error_page   500 502 503 504  /50x.html;
    location = /50x.html {
        root   /srv/www;
    }

    # proxy the PHP scripts to Apache listening on 127.0.0.1:80
    #
    #location ~ \.php$ {
    #    proxy_pass   http://127.0.0.1;
    #}

    # pass the PHP scripts to FastCGI server listening on 127.0.0.1:9000
    #
    location ~ \.php$ {
         root           /srv/www/finance/public;
         fastcgi_pass   127.0.0.1:9000;
         fastcgi_index  index.php;
         fastcgi_param  PHP_VALUE  "open_basedir=/srv/www/finance/:/tmp/:/proc/";
         fastcgi_param  SCRIPT_FILENAME  $document_root$fastcgi_script_name;
         include        fastcgi_params;

         set $real_script_name $fastcgi_script_name;
            if ($fastcgi_script_name ~ "^(.+?\.php)(/.+)$") {
            set $real_script_name $1;
            set $path_info $2;
         }
         fastcgi_param SCRIPT_FILENAME $document_root$real_script_name;
         fastcgi_param SCRIPT_NAME $real_script_name;
         fastcgi_param PATH_INFO $path_info;
    }

    # deny access to .htaccess files, if Apache's document root
    # concurs with nginx's one
    #
    location ~ /\.ht {
        deny  all;
    }
}
nginx问题解决
1. 403 Forbidden
问题分析:1)检查文件或目录(/srv/www/)权限问题;2)配置检查:访问文件类型,index index.php index.html index.htm
2.访问时,出现以下内容:
File not found.
No input file specified.
问题分析:1)检查路径配置是否正确;2)检查php-fpm配置
3.
参考资料
http://www.nginx.cn/231.html
https://www.nginx.com/
https://www.nginx.com/resources/wiki/start/topics/tutorials/install/
安装MySQL
注意:这里下载的是rpm安装包。
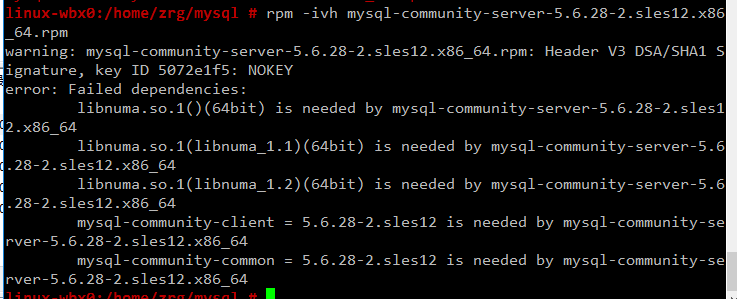
1.rpm安装时,报如下错误,这是因为需要安装这些依赖包:
或是这样:

如果是第一个图所示错误,可以下载安装numactl,
# wget http://mirror.centos.org/centos/6/os/x86_64/Packages/numactl-2.0.9-2.el6.x86_64.rpm
# rpm -ivh numactl-2.0.9-2.el6.x86_64.rpm

如果是第二个图所示错误,可以
#rpm -ivh glibc-2.17-4.17.1.x86_64.rpm --force
接着依次安装mysql附带软件:
# rpm -ivh mysql-community-libs-5.6.28-2.sles12.x86_64.rpm
# rpm -ivh mysql-community-client-5.6.28-2.sles12.x86_64.rpm
# rpm -ivh mysql-community-common-5.6.28-2.sles12.x86_64.rpm
# rpm -ivh mysql-community-server-5.6.28-2.sles12.x86_64.rpm

在此安装过程中,可能已经安装它其他版本的mysql,可以通过删除其他版本,在进行安装。
安装完成后,可以通过 # mysql_secure_installation 命令设置root用户密码。
安装MariaDB
//非源码安装方式
yum install mariadb mariadb-server net-tools
安装PHP
安装php扩展
jpeg
官网下载地址:http://www.ijg.org/
安装时需要在安装目录jpeg下新建bin,include,lib,man/man1目录。
#tar -zvxf jpegsrc.v6b.tar.gz
#cd jpeg-6b
#CFLAGS="-O3 -fPIC" ./configure --prefix=/usr/local/jpeg6/ --enable-shared --enable-static
此时可能会报出现如下错误:

解决:复制config.guess和config.sub到安装目录下
#cp /usr/share/libtool/config/config.guess ./
#cp /usr/share/libtool/config/config.sub ./
再次执行上面的配置语句。问题解决。
使用64位函数库编译安装:
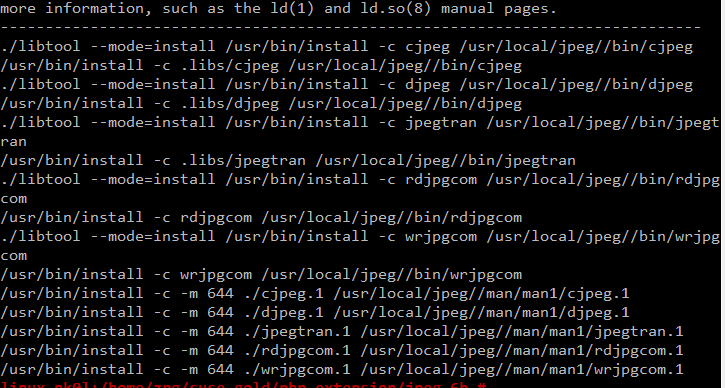
make libdir=/usr/lib64 && make libdir=/usr/lib64 install
成功标志:
libpng
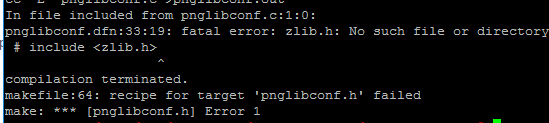
libpng无需配置
#cp scripts/makefile.std makefile
#vim makefile
找到CFLAGS,加入-O3 -fPIC -I$(ZLIBINC)

#make && make install
此时,可能会出现错误,解决:先把Zlib安装了,在重新安装libpng,如果仍然报错,运行安装zlib-devel
 rpm -ivh zlib-devel-1.2.8-5.1.2.x86_64.rpm
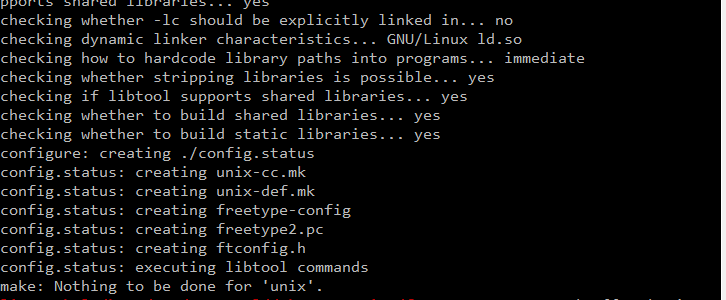
 重新编译出现下图提示信息,此时只需执行下面两个命令即可:

#make clean
在运行一下:
#ldconfig    #动态链接库管理命令,
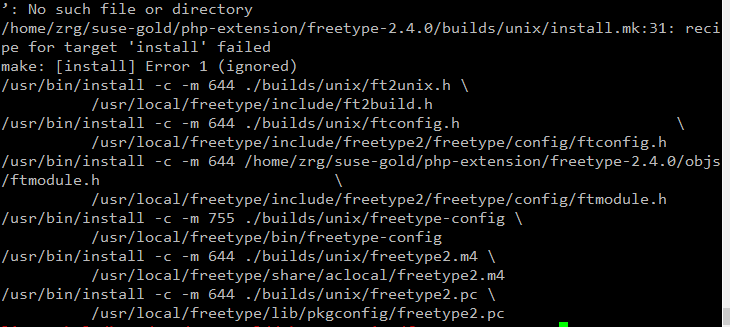
freetype
Freetypr:http://download.savannah.gnu.org/releases/freetype/freetype-2.3.5.tar.gz
# ./configure --prefix=/usr/local/freetype
成功标志:
#make && make install
成功标志:
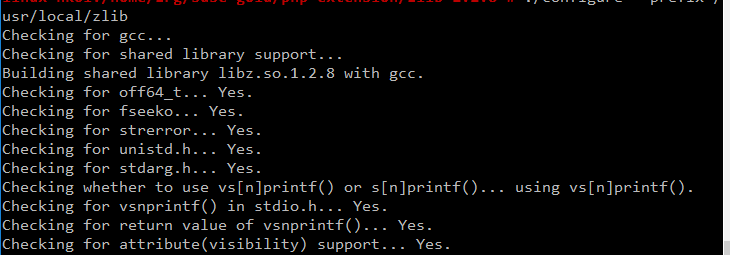
zlib
#./configure --prefix=/usr/local/zlib
成功标志:
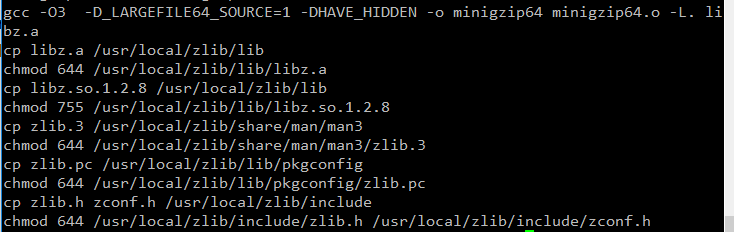
#make && make install
成功标志:
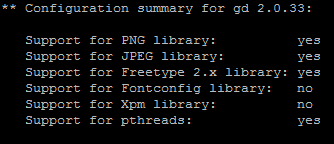
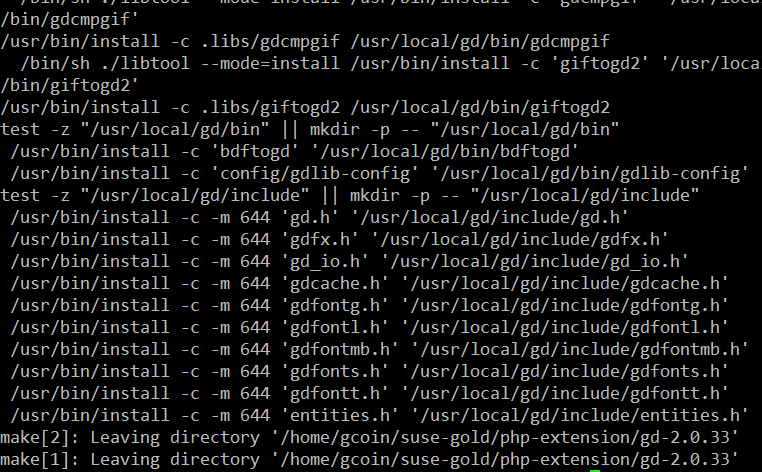
gd
CFLAGS="-O3 -fPIC" ./configure --prefix=/usr/local/gd --with-jpeg=/usr/local/jpeg
 --with-png=/usr/local/lib --with-zlib=/usr/local/zlib --with-freetype=/usr/local/freetype
成功标志:
编译安装:
# make && make install
可能会报如下错误,检查libpng是否安装正确。
安装完成标志:
curl
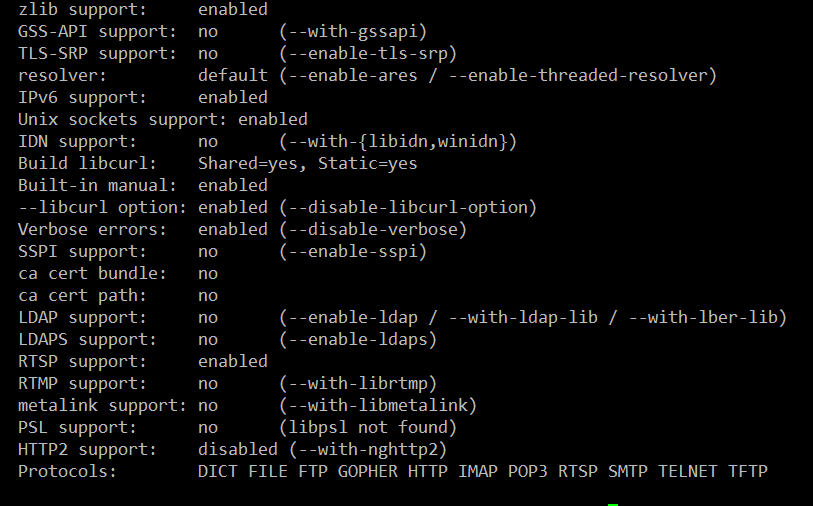
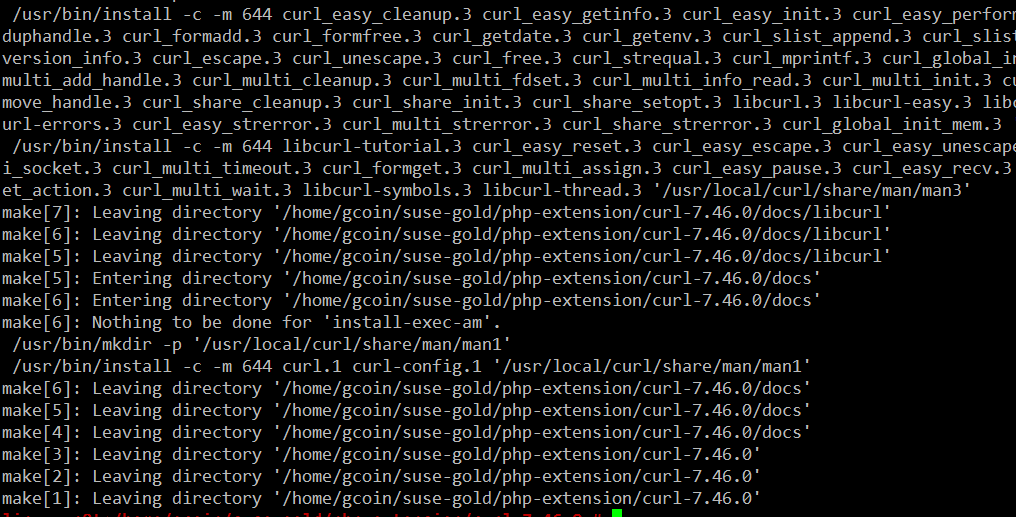
下载地址 http://curl.haxx.se/
#./configure --prefix=/usr/local/curl
#make && make install ,成功标志:
安装php
$ tar zxvf php-5.4.45.tar.gz
$ cd php-5.4.45
$ ./configure --prefix=/usr/local/php \
--with-apxs2=/usr/local/apache2/bin/apxs \
--with-gd \
--with-jpeg-dir=/usr/local/jpeg6 \
--with-zlib-dir=/usr/local/zlib \
--with-png-dir=/usr/local/lib \
--with-freetype-dir=/usr/local/freetype \
--with-curl=/usr/local/curl \
--with-mysql \
--with-pdo-mysql \
--with-mysqli
--enable-ftp \
--with-pcre-regex \
--with-mhash \
--enable-fpm \
--enable-mbstring \
--enable-sockets \
--enable-sysvsem \
--enable-sysvshm \
--enable-pcntl \
--enable-mbregex \
--enable-zip \
--enable-fileinfo \
此时,会报下图错误,解决办法就是安装zlib-devel,# zypper in libxml2-devel -y
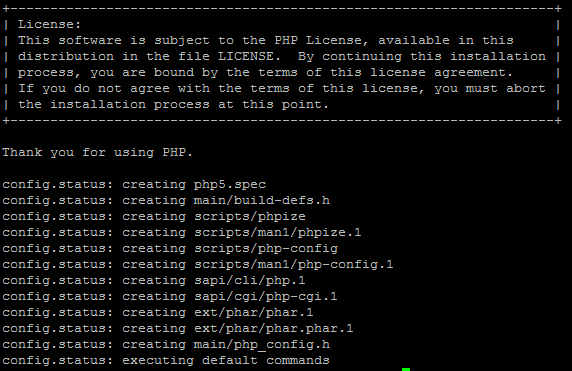
 重新执行上面的配置命令。出现字样"Thank you for using PHP.",表示成功了。成功标志:
 编译安装:
编译安装:
# make && make install
成功标志:
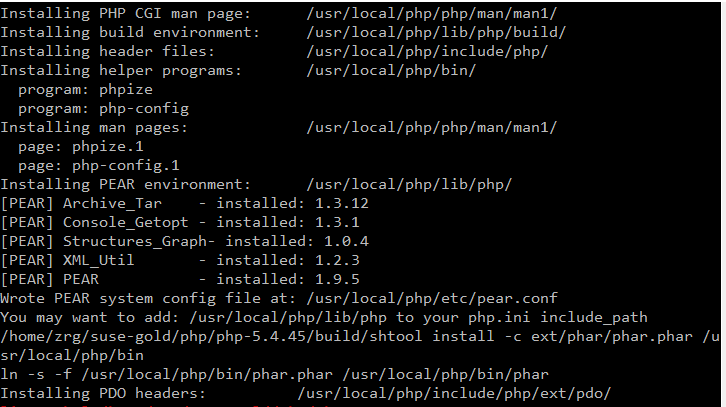
检测PHP是否安装成功
请检查httpd.conf文件中,下面两行代码是否已添加:
LoadModule php5_module        modules/libphp5.so
...
AddType application/x-httpd-php .php
AddType application/x-httpd-php-source .phps
...
<IfModule dir_module>
DirectoryIndex index.php index.html
</IfModule>

编辑完成后,重启apache: /etc/init.d/apachectl restart

创建和编辑php.ini:
#cp php.ini-development /usr/local/php/lib64/
#cd  /usr/local/php/lib64/
#cp php.ini-development php.ini
#vim php.ini

新建文件查看phpinfo是否都已加载并正常显示,
<?php
phpinfo();
?>
bcmath扩展安装
也许这个扩展会用到。

一般情况下这个扩展在php安装的时候,是存在安装包中ext/bcmath目录下。利用phpize进行安装新的php扩展。
#cd ext/bcmath/
#/usr/local/php/bin/phpize                    ;执行(phpize的路径根据各自安装有所不同)
#find /usr/local/php/ -name php-config                ;先查找php-config在哪个地方
#./configure --with-php-config=/usr/local/php/bin/php-config          ;配置bcmath
# make
# make install
# find /usr/local/php/ -name bcmath.so            ;查看bcmath.so在那个路径下
现在配置php,制定扩展路径及加载so文件:

需要安装其他扩展,使用同样的操作。
特别提示1:
 可能在make的时候,会遇到错误
 错误:‘PHP_FE_END’未声明(不在函数内) -----{error: ‘PHP_FE_END’ undeclared here (not in a function)}
 解决方法: 源代码有错误,进入php-5.3.18/ext/mcrypt目录
 sed -i 's|PHP_FE_END|{NULL,NULL,NULL}|' ./*.c
 sed -i 's|ZEND_MOD_END|{NULL,NULL,NULL}|' ./*.c
 再重新make && make install

特别提示2:
 openssl扩展安装,需要安装libssl-dev,
 $ sudo apt-get install libssl-dev

特别提示3:
 openssl扩展安装配置时,出现错误信息:cannot find config.m4
 解决:mv config0.m4 config.m4
php-fpm配置
cp /usr/local/php/etc/php-fpm.conf.default etc/php-fpm.conf
vim /usr/local/php/etc/php-fpm.conf
content:
        user=username
        group=groupname
//开启php-fpm
/usr/local/php/sbin/php-fpm start
Memcache安装指南
服务端安装
//安装必须组件
$apt-get install libevent-dev
或下载libevent-dev源码安装:libevent.org or https://sourceforge.net/projects/levent/
//下载Memcached
网址:http://memcached.org/downloads
//安装Memcached
$tar zxvf memcached-1.5.4.tar.gz
$cd memcached-1.5.4
$./configure --prefix=/usr/local/memcached --with-libevent=/usr/local/libevent
$make && make install
或通过apt-get命令直接安装:$apt-get install memcached
//启动Memcached
$/usr/local/memcached/bin/memcached -m 64 -p 11211 -u nobody -vv -d
-d表示在后台运行
$ps aux |grep memcached
客户端安装
第一步,安装libmemcached库
//下载libmemcached
网址:https://launchpad.net/
//解压安装
$tar zxvf libmemcached-1.0.18.tar.gz
$cd libmemcached-1.0.18
$./configure --prefix=/usr/local/libmemcached
#make && make install
第二步,安装PHP memcache、memcached扩展
### memcache 扩展
$git clone https://github.com/websupport-sk/pecl-memcache memcache
$cd memcache
$/usr/local/php7/bin/phpize
$./configure --with-php-config=/usr/local/php7/bin/php-config
#make && make install
//编辑php.ini文件,加入:extension=memcache.so
//重启Apache,查看memcache扩展是否加载
### memcached 扩展
$git clone https;//github.com/php-memcached-dev/php-memcached.git
$cd php-memcached
$git checkout php7 //进入php7分支
$/usr/local/php7/bin/phpize
$./configure --with-php-config=/usr/local/php7/bin/php-config \
--with-libmemcached-dir=/usr/local/libmemcached
--disable-memcached-sasl
//同样,编辑PHP配置文件,加入:extension=memcached.so
//重启Apache,查看memcached扩展是否加载
参考资料
memcache官网:http://memcache.org/
Linux Memcached 安装:http://www.runoob.com/memcached/memcached-install.html
linux下安装PHP memcached扩展:http://www.cnblogs.com/flywind/p/6021568.html
编译安装Memcached勾结php7:https://www.jianshu.com/p/c7e59afabc28
PHP7 下安装 memcache 和 memcached 扩展:http://www.lnmp.cn/install-memcache-and-memcached-extends-under-php7.html
Linux下的Memcache安装:http://kimi.it/257.html
Memcache基础教程:http://kimi.it/259.html
再次声明
由于每台机器安装的系统并非完全一样,安装系统时自带的包有所差异,所以该指南仅供参考。关于该指南,如果你有任何问题,
你可以发邮件到我的邮箱,邮箱地址为 zrg1390556487@gmail.com
参考资料
https://xwsoul.com/posts/684
http://php.net/
http://www.apache.org/
https://www.mysql.com/
https://mariadb.org/