If you have any questions abount this article, or if you have found any errors in this article, e-mail me, please. My email address: zrg1390556486@gmail.com
This article is for communication only, please do not use for business! The author of this article is not responsible for any consequences. thanks for your attention. Thank you.
1. Server
1.1. Buy a Cloud Host
- DigitalOcean
- AWS
- Vultr
1.2. Solution 1: Using Original Shadowsocks
Installing pip
# yum install python3-pip
or
# curl "https://bootstrap.pypa.io/get-pip.py" -o "get-pip.py"
# python get-pip.py
// update
# pip3 install --upgrade pip
Installing shadowsocks
# pip3 install shadowsocks
# vim /etc/shadowsocks.json
{
  "server": "server_ip",//server ip address
  "server_port": 8388,//server port
  "local_address":"127.0.0.1",//local address
  "local_port":1080,//local port
  "port_password":{ //multiple port
          "9001":"password9001",
          "9002":"password9002",
          "9003":"password9003",
     },
  "password": "password",//password
  "method": "aes-256-cfb",//encryption
  "timeout":600 //timeout
  }
explanation:
- "server": "123.123.123.123" :: server ip address
- "server_port": 8388 :: server port
- "local_address":"127.0.0.1" :: local ip address
- "local_port":1080, :: local port
- "port_password" :: port and password
- "password": "password" :: password
- "method": "aes-256-cfb" :: encrypt method, more detail:[[http://ucdok.com/project/generate_password.html][password tool]]
- "timeout":600 :: over time
Configuring auto-start script
#vim /etc/systemd/system/shadowsocks.service
[Unit]
Description=Shadowsocks

[Service]
TimeoutStartSec=0
ExecStart=/usr/bin/ssserver -c /etc/shadowsocks.json

[Install]
WantedBy=multi-user.target
Start shadowsocks
#systemctl enable shadowsocks
#systemctl start shadowsocks
#systemctl status shadowsocks -l
Auto install script
$ vim install-shadowsocks.sh, content of file from
# chmod +x install-shadowsocks.sh
# ./install-shadowsocks.sh
1.3. Solution 2: Using docker
Installing docker
# CentOS Linux
# yum install docker
# systemctl enable docker
# systemctl start docker
# CentOS Stream
# Official Site from Docker: https://docs.docker.com/engine/install/centos/
# yum install -y yum-utils
# yum-config-manager --add-repo https://download.docker.com/linux/centos/docker-ce.repo
# yum install docker-ce docker-ce-cli containerd.io
# systemctl start docker
# systemctl enable docker
Deploy shadowsocks
# docker run -dt --name ss -p 6443:6443 mritd/shadowsocks -s "-s 0.0.0.0 -p 6443 -m aes-256-cfb -k test123 --fast-open"
2. Client
2.1. Linux
2.1.1. Command Line Client on Linux
Linux series
Debian/Ubuntu:
$ sudo apt-get install python-pip
$ sudo pip install shadowsocks
Fedora/Centos:
$ sudo yum install python-setuptools   or   sudo dnf install python-setuptools
$ sudo easy_install pip
$ sudo pip install shadowsocks
OpenSUSE:
$ sudo zypper install python-pip
$ sudo pip install shadowsocks
Archlinux:
$ sudo pacman -S python-pip
$ sudo pip install shadowsocks
sslocal is the client software and ssserver is the server software. On some Linux distros such as ubuntu, the shadowsocks client sslocal is installed under usr/local/bin. On Others such as Arch sslocal is installed under /usr/bin. Your can use whereis command to find the exact location.
$ whereis sslocal
sslocal: /usr/local/bin/sslocal
/etc/shadowsocks.json
{
"server":"server-ip",
"server_port":8000,
"local_address": "127.0.0.1",
"local_port":1080,
"password":"your-password",
"timeout":600,
"method":"aes-256-cfb"
}
// start $ sudo sslocal -c /etc/shadowsocks.json
// To run in the background
$ sudo sslocal -c /etc/shadowsocks.json -d start
/etc/rc.local
$ sudo vim /etc/rc.local
sudo sslocal -c /etc/shadowsocks.json -d start
// Check if It Works
# sudo systemctl status rc-local.service
2.1.2. Global Proxy
Install and Configure polipo
$ sudo apt install polipo
$ sudo vim /etc/polipo/config
logSyslog = true
logFile = /var/log/polipo/polipo.log
proxyAddress = "0.0.0.0"
socksParentProxy = "127.0.0.1:1080"
socksProxyType = socks5
chunkHighMark = 50331648
objectHighMark = 16384
serverMaxSlots = 64
serverSlots = 16
serverSlots1 = 32
Restart polipo
$ sudo systemctl restart polipo
Export http_proxy and https_proxy
$ export http_proxy="http://127.0.0.1:8123/"
$ export https_proxy="https://127.0.0.1:8123/"
testing
$ curl www.google.com
2.1.3. Solving Problem
ShadowSocks start error: undefined symbol EVP_CIPHER_CTX_cleanup [Reason]
openssl 1.1.0 "EVP_CIPHER_CTX_cleanup" is old.
[Solving]
$ vim /usr/local/lib/python3.5/dist-packages/shadowsocks/crypto/openssl.py
VIM Command:
:%s/cleanup/reset/
:x
not support "chacha20" [Solving]
$ apt install m2crypto gcc -y
$ wget -N --no-check-certificate https://download.libsodium.org/libsodium/releases/libsodium-1.0.8.tar.gz
$ tar zxvf libsodium-1.0.8.tar.gz
$ cd libsodium-1.0.8
$ sudo ./configure
$ sudo make && make install
$ sudo echo "include ld.so.conf.d/*.conf" > /etc/ld.so.conf
$ sudo echo "/lib" >> /etc/ld.so.conf
$ sudo echo "/usr/lib64" >> /etc/ld.so.conf
$ sudo echo "/usr/local/lib" >> /etc/ld.so.conf
$ sudo ldconfig
2.2. Windows
2.2.1. Download
Get shadowsocks client by sending email to zrg1390556487@gmail.com
2.2.2. Configure
- unzip
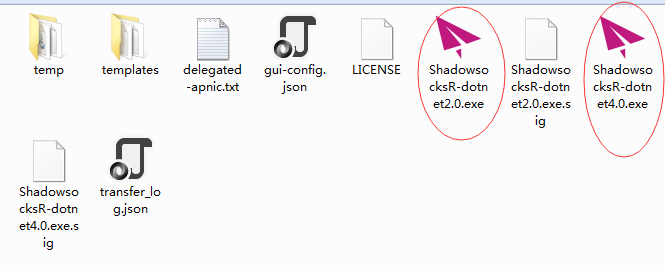
- running
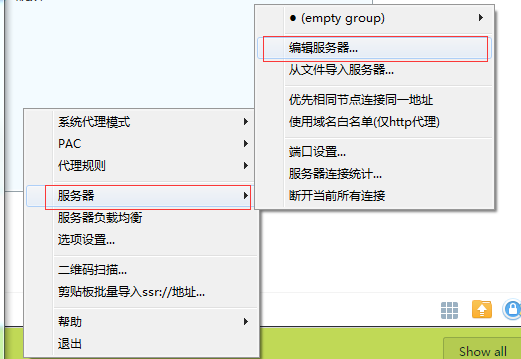
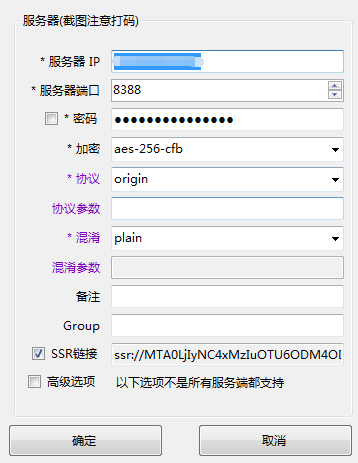
- configuring
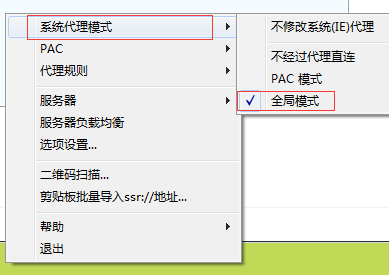
- proxy
2.3. Android
2.3.1. Download
Get shadowsocks client by sending email to zrg1390556487@gmail.com
2.3.2. Configure
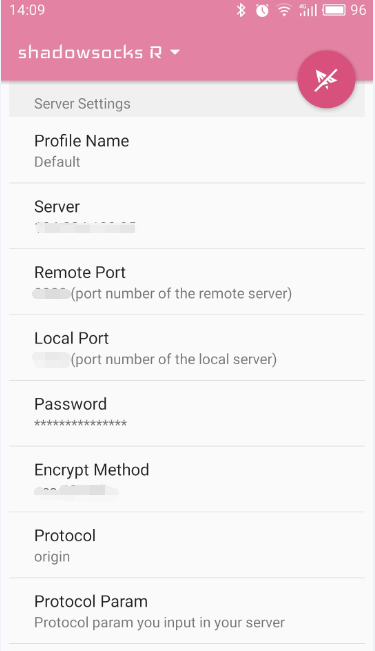
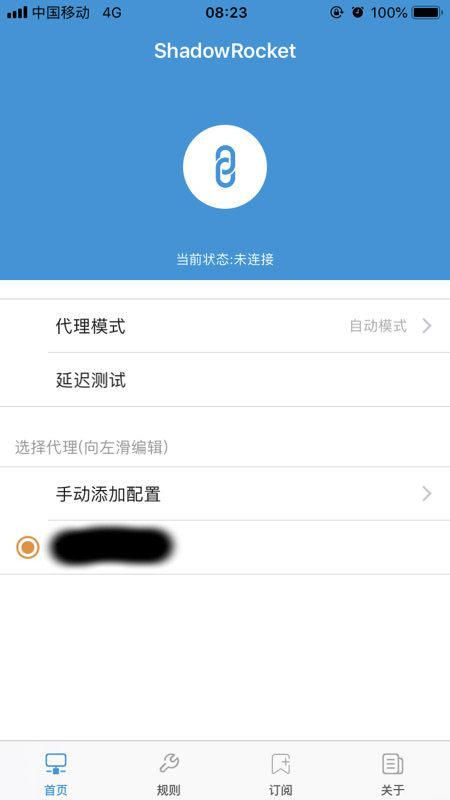
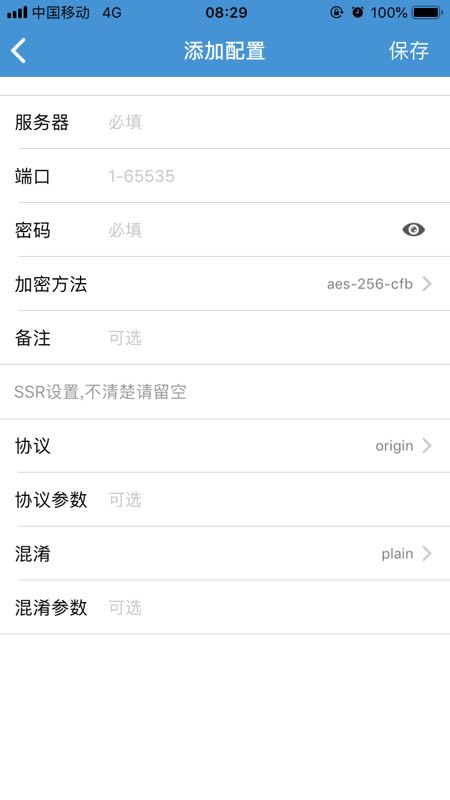
2.4. IOS
- Open "App Store", To search "shadowrocket". Current price: ¥12
- Add server configure. Okay.
2.5. Mac OS X
3. Browser Plugin: SwitchyOmega
3.1. Download
Get shadowsocks client by sending email to zrg1390556487@gmail.com
3.2. Configure
- set proxy
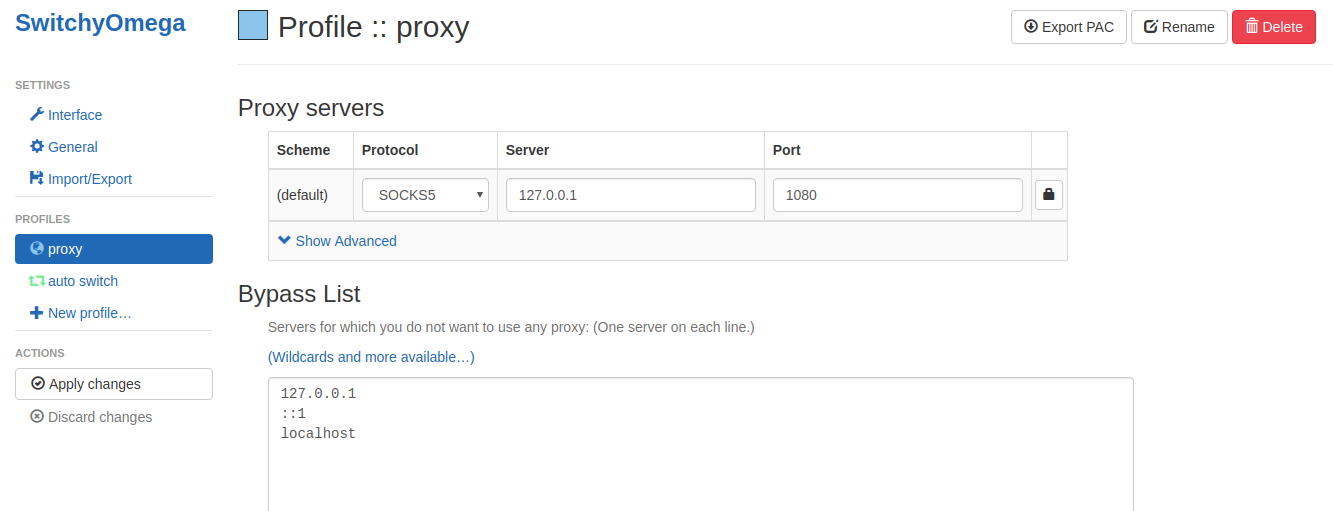
set rule
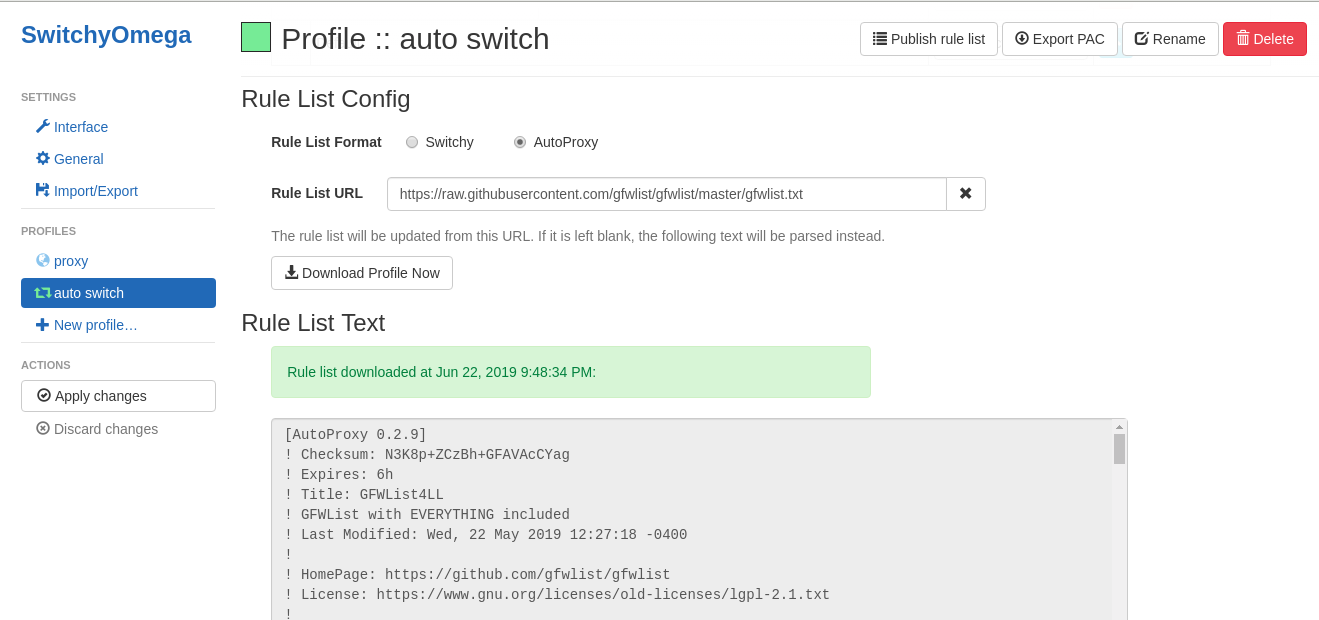
rule:http://autoproxy-gfwlist.googlecode.com/svn/trunk/gfwlist.txt
or
https://raw.githubusercontent.com/gfwlist/gfwlist/master/gfwlist.txt
4. References
- https://zh.wikipedia.org/zh-hans/Shadowsocks
- https://shadowsocks.com
- http://shadowsocks.org/
- 在 CentOS 7 下安装配置 shadowsocks
- Install And Use Shadowsocks Command Line Client on Linux
- ShadowsocksR 客户端 小白使用教程
- ShadowSocks启动报错undefined symbol EVP_CIPHER_CTX_cleanup
- SwitchyOmega
- IOS系统推荐几款支持Shadowsocks的代理软件
- 各种系统下Shadowsocks客户端的安装与配置
- linux 配置shadowsocks代理全局代理
- linux ubuntu下使用ss设置全局代理,命令行也走代理